If you like seeing results immediately after changing your code, chances are you’re hitting “save” every few seconds in the Neocities editor. This is totally fine—but if you don’t want to constantly update your site or rack up thousands of “updates” on your profile, consider editing your website locally in VS Code instead of using the Neocities editor.
Prerequisites
- A Neocities account
- Visual Studio Code
That’s it! This guide does not use or require GitHub. You can integrate git later if you want, but for now, we’re only using VS Code to edit files—not to deploy or upload them.
1. Install Visual Studio Code
Download it from Microsoft’s website and follow the on-screen instructions to install it.
2. Download Your Site from Neocities
If you don’t already have a local copy of your website saved, go to your Neocities dashboard and scroll to the bottom. Click Download entire site, or click here directly. This may take a while depending on your site’s size.
After downloading, you should have a file named neocities-YOURSITENAME.zip.
3. Create Your Workspace
Choose a directory on your machine where you’d like to keep your website. For example, C:\..\Documents\website\howsoonisnow.
- Create a new folder and name it however you like.
- Extract neocities-YOURSITENAME.zip into that folder. Let’s call it yoursite.
You should now have something like C:\YOUR PATH\yoursite.
Now, open VS Code and go to File → Open Folder…, then select C:\YOUR PATH\yoursite.

Once open, go to File → Save Workspace As… and save it wherever you want.
Edit your site
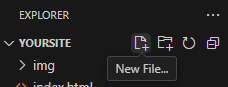
That’s it! Open, edit, and save files just like you normally would. You can create new files and folders either through your file explorer or directly within VS Code. When you’re done, drag and drop the files or folders into Neocities.
Are you using relative links?
Relative links point to locations relative to the current file or directory, not full URLs.
Example: Instead ofhttps://yoursite.neocities.org/folder/image.jpg, use/folder/image.jpg.
This is good practice in general, but it’s especially important for the next step.
Preview your site with Live Server
VS Code doesn’t have a built-in website previewer, so we’ll install an extension. In the sidebar, click on Extensions and search for Live Server (Extension ID: ritwickdey.LiveServer). Install it. Now, when you right-click on an .html file in your folder, you should see Open with Live Server.

This will open your page in a browser tab, typically something like http://127.0.0.1:5500/index.html.
If your Neocities site folder is nested within another folder but you want that outer folder to be the root of your workspace, you’ll need to configure the Live Server root path. This is especially useful if you later deploy with github and want the public folder to act as the root.
To make sure your relative links work both on Neocities and during local preview, set a custom root path in the Live Server settings.
Custom Live Server root path
- Open your project folder in VS Code
- Open workspace settings:
- Click on the bottom left corner gear icon → Settings.
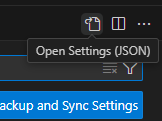
- Click the little file with an arrow icon in the top right to open
settings.jsondirectly (or pressCtrl + Shift + P→ type: “Preferences: Open Settings (JSON)”).
- Add or modify the
liveServer.settings.rootsetting with your desired path. For example:
{
  "liveServer.settings.root": "/yoursite"
}
Warning
Make sure the specified directory (like
yoursite) exists, otherwise Live Server may fail to start.
Example Structure
If your project looks like:
my-website/
├── public/
│   ├── index.html
│   └── folder/
│       └── index.html
├── .vscode/
│   └── settings.json
└── assets/
    └── whatever.png
Your .vscode/settings.json should include:
{
  "liveServer.settings.root": "/public"
}